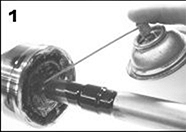
| 1. After removing the old boot, clean the joint and allow it to dry. Aerosol Carburetor or Brake Cleaner can be used to flush out the old grease if there is minimal contamination. (Follow the safety precautions listed on the can including the use of safety glasses.) If the joint is extremely contaminated, disassemble and clean the joint per the manufacturers repair manual.
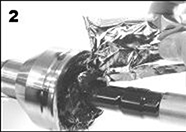
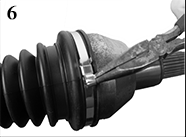
2. Cut the grease packet diagonally at one corner. Squeeze the packet to provide a controlled flow of grease into the inside face of the CV joint concentrating the grease close to the axel. Also apply a light film of grease to the inside circumference of the small end of the boot where it will contact the axle. Remove extra grease from the outer edge of face of the bell.
3. Slide the boot along the axle up to the CV joint. Next pull the large end of the boot lightly onto the joint. At the same time slide the small end of the boot toward the joint while pinching the small end to release trapped air. You will hear air escape as the boot anchors onto the joint. If the larger circumference is too big, use the smaller circumference as shown in photo 11.
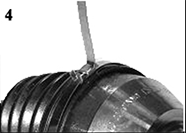
4. Wrap the long clamp around the large-end of the boot and thread the clamp through the buckle. Pull the clamp tight and bend it as shown to hold it in place. If you are using a needle nose plier to tension the clamp, trim the clamp leaving approximately a 2 tail. If you are using a banding tool do not trim the clamp and substitute your banding tool instructions.
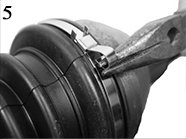
5. Use your needle nose plier as shown to tension the clamp. Rotate the plier so the clamp is drawn down and under (clockwise in this photo) or damage may occur to the clamp buckle. A properly tensioned clamp should be tight enough so the CV boot will not turn on the joint, but not so tight that it will damage the rubber boot or the clamp.
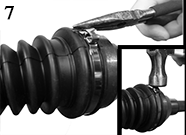
6. When the clamp is properly tensioned, twist the plier to the side to put a crimp in the clamp. This crimp will hold clamp tension during step 7.
7. Roll plier and clamp tail back over the top of the buckle. Remove the plier and flatten out the clamp.
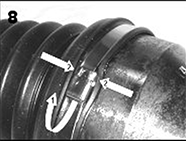
8. Using a pliers or hammer, tap the locking ears of the buckle to hold clamp tail as shown. Trim tail as needed to remove excess material.
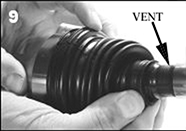
9. Slide the small end of the boot away from the joint until the boot is at its natural length. Vent the boot by pinching the small end and the boot will regain its original shape.
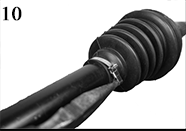
10. Install the short clamp in the same method as the long clamp.
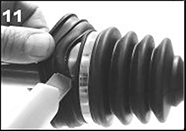
11. If a smaller diameter on the large end of the boot was used to achieve a tight fit, cut off excess material along the score line with a sharp knife. Do not cut the small end of the boot.
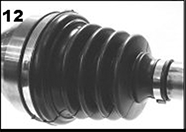
12. Boot installation is complete. Follow the manufacturer repair manual to re-install the axle.
|